Wednesday, January 13, 2010
We interrupt this blog...
So, apparently it is easy to blog daily when you are on vacation, but once real life pops in and makes a show of it, it becomes more difficult. But I still want to do THIS blog daily (or at least have daily posts). So I am going to most likely do the work on the weekends when I have more time to play with the kids, and have scheduled postings. I do have the theme for this week worked out, with lots of very cool crafts. I hope to get on them tomorrow...so, hang tight. You are not forgotten. :)
Green Eggs and Ham
This is an awesome craft that is fun and easy to do, plus it becomes a fun game you can play for hours afterward. It can enhance word recognition, learning rhymes and fine motor skills.
Age: 2 & up
Difficulty rating: 1 out of 5
Messiness rating: minimal
Time: 10 minutes
Supplies:
Coffee Can or large tin can
13 Clothes Pins (either kind--spring or no)
Craft glue
print out pictures
paint (optional)
Decorations for can (optional)
The Rhymes:
Here/There
House/Mouse
Fox/Box
Car
Boat/Goat
Train/Rain
Dark
Tree
The Craft
Pictures and templates:
to come soon!
Age: 2 & up
Difficulty rating: 1 out of 5
Messiness rating: minimal
Time: 10 minutes
Supplies:
Coffee Can or large tin can
13 Clothes Pins (either kind--spring or no)
Craft glue
print out pictures
paint (optional)
Decorations for can (optional)
The Rhymes:
Here/There
House/Mouse
Fox/Box
Car
Boat/Goat
Train/Rain
Dark
Tree
The Craft
- If you are going to paint the clothes pins, do this first.
- Print out and have your child color the pictures.
- Cut out the pictures and glue them to each clothes pin.
- As you read the story, you can have the child put the pins on the can as the rhyme moves along, or you can have the child match the rhyming words.
- You can also write the word on the bottom of the clothes pin to start to teach word recognition.
- You can have the child decorate the tin with tissue paper and a 50/50 glue water mixture, but this bumps up the messiness rating to like 7 out of 5. The kiddo would paint the tin with the glue mixture and apply the tissue/wrapping paper to the outside. Let dry thoroughly before putting the pins on the tin.
Pictures and templates:
to come soon!
Monday, January 11, 2010
Cat in the Hat
Now we will start doing books! I borrowed the idea from Jocelyn over at http://beinglds.blogspot.com. She did the book a day over the Christmas holidays and I thought it was brilliant, so ya know, they say imitation is the best form of flattery and all that.
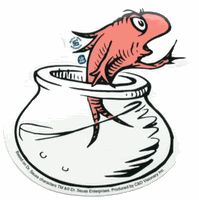
So, we have all read the Cat in the Hat, right? The craft possibilities for this are limitless..but I personally am a huge fan of the fish. So, we did a fishy craft.
Age: 3 & up
Difficulty rating: 2 out of 5
Messiness rating: minimal
Time: 10 minutes
Supplies:
Dixie cup or small cup
Cut out picture of the fish (you can trace it, print it or enlarge it too)
Craft stick
Blue tissue paper for water
White tissue paper
Construction paper, or cardboard paper
The Craft:
So, we have all read the Cat in the Hat, right? The craft possibilities for this are limitless..but I personally am a huge fan of the fish. So, we did a fishy craft.
Age: 3 & up
Difficulty rating: 2 out of 5
Messiness rating: minimal
Time: 10 minutes

Supplies:
Dixie cup or small cup
Cut out picture of the fish (you can trace it, print it or enlarge it too)
Craft stick
Blue tissue paper for water
White tissue paper
Construction paper, or cardboard paper
The Craft:
- Cover the cup with white tissue paper.
- Cut out a spout and a handle.
- Cut a slit in the bottom of the cut for the craft stick.
- Glue the fish to the craft stick.
- Stick the craft stick through the slit, so the fish is in the "tea pot."
- Put blue tissue paper around it for the water in the pot.
- Move stick up and down as the fish pops in and out of the water!
Sunday, January 10, 2010
Humpty Dumpty
A tactile craft! Your kids will get to put Humpty Dumpty together again! Show them they can do better than ALL the king's horses and ALL the king's men! (But that isn't really fair, because just how much use is a horse in this situation anyway? Not like they have opposable digits or fine motor movements. Sheesh. Probably could have put Humpty back together before the horses tried to help!)


The Rhyme:
Humpty Dumpty sat on a wall.
Humpty Dumpty had a great fall.
All the kings horses and all the kings men
Couldn't put Humpty together again.
Age: 2 & up
Difficulty rating: 2 out of 5
Messiness rating: moderate potential
Time: 10 minutes
Supplies:
construction paper: white, red, blue, green, black
scissors
crayons
googly eyes
tactiles, such as rice, corn meal, crushed egg shells (not too small), etc.
yarn
pencil
The Craft:
- Cut out bricks, about 1" x 3". Depending on the size of your paper, you might need more or less. I made 8.
- Cut an oval, for Humpty.
- Take the oval and lay it on a piece of green paper. Trace the bottom 1/3 of the oval in pencil, and draw a straight line across the top.
- From this 1/3 oval, draw two rectangles off the bottom. These will be his pants.
- Cut a thin strip (about 1/2 inch thick and twice the width of your oval) of white. This will be his arms.
- Cut an oval in black, then cut that in half. These are his shoes.
- Cut two mitten shapes for gloves.
- Now that all the shapes are cut out, have your child glue the bricks on the blue background.
- Glue Humpty sitting on the wall.
- Glue on the arms (I glued them about 1/3 up from the bottom, at the top of his pants. The strip of arms goes under his pants.
- Only glue the arms on the "body" of the egg. Fold up what extends beyond the egg outline. I folded once at the "body" and once for the elbow.
- Glue on pants--just to the bottom of the oval.
- Fold the pants to show the knees.
- Glue the shoes on the pants.
- Glue on googly eyes, yarn mouth and nose (we drew ours on)
- Lay glue down as the "mortar" between the bricks and let the kids sprinkle sugar on it. The rough texture will represent the roughness of the brick wall.
- Glue egg shell pieces to the oval. The pieces should be small, but not too small. (I skipped this step because I did not have any eggs.)
- Apply glue over the bricks and sprinkle corn meal or something rough to give a gritty texture.
- Let dry. You now have a 3-D textile Humpty Dumpty poster.
Saturday, January 9, 2010
Little Boy Blue
To add to the musical-ness that all kids should enjoy, we are going to make a horn today. It is quite easy and quite fun.
The Rhyme:
Little Boy Blue come blow your horn,
The sheep's in the meadow,
The cow's in the corn.
Where is the little boy
Who looks after the sheep?
He's under a haystack,
Fast asleep.
Age: 2 & up
Difficulty rating: 1 out of 5
Messiness rating: minimal
Time: 5 minutes
Supplies:
Paper towel roll/toilet tissue roll
Wax paper (4" square)
Rubber Band
Pencil
Decorating items (Stickers, crayons, markers, etc.)
The Craft:
- Decorate the tube as desired.
- Poke holes in the tube, about 1 inch apart.
- Put the piece of wax paper over the end and secure it with a rubber band.
- Viola! Done! Now let the musical wonder play away!
Friday, January 8, 2010
Mary, Mary Quite Contrary
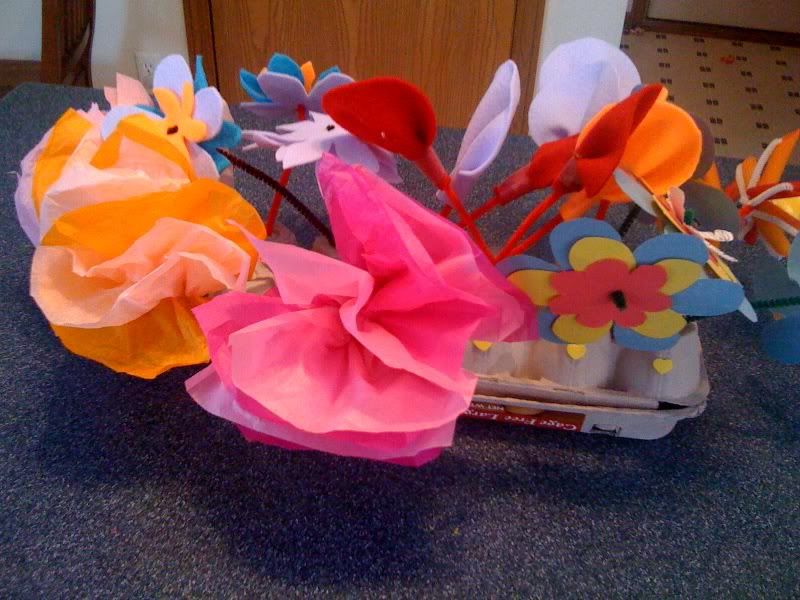
Snowbound? I know we are. So with the extra time today we made a flower garden--to brighten the dreary indoors and make spring seem more like a reality than a distant dream.
The Rhyme:
Mary, Mary, quite contrary,
How does your garden grow?
With silver bells and cockle shells,
And little maids, all in a row.
Age: 4 & up
Difficulty rating: 2-3 out of 5 (depends on the flower)
Messiness rating: moderate
Time: 10-15 min
Supplies:
egg carton
the rest depends on the flowers you want to create.
Felt Flowers:
Felt
Scissors
Pipe cleaner
pompoms (optional)
tape (for cockle-shells)
Tissue Paper Flowers:
Tissue paper squares, 4 layers for each flower, roughly 5x5.
Pipe cleaner
scissors
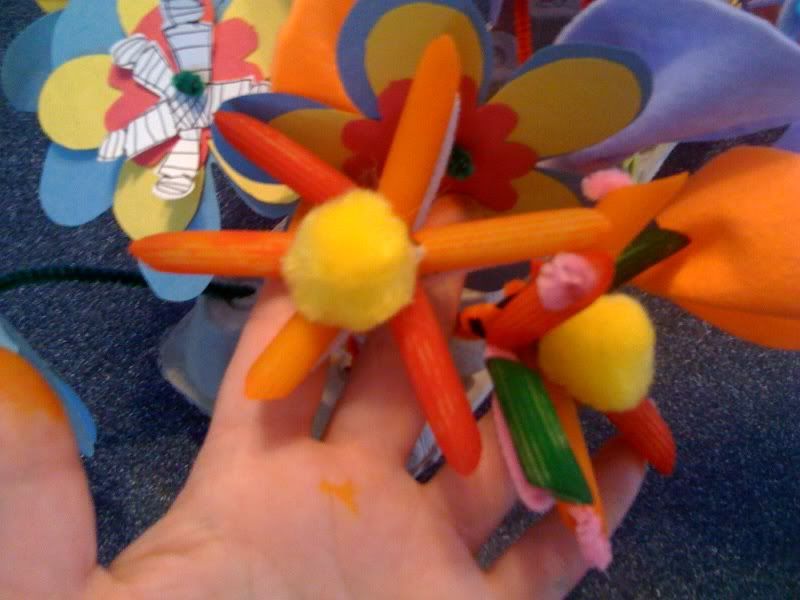
Noodle Flowers:
penne, macaroni or some other hollow noodle
food coloring
plastic baggies (one for each color)
pipe cleaners
pompoms (optional)
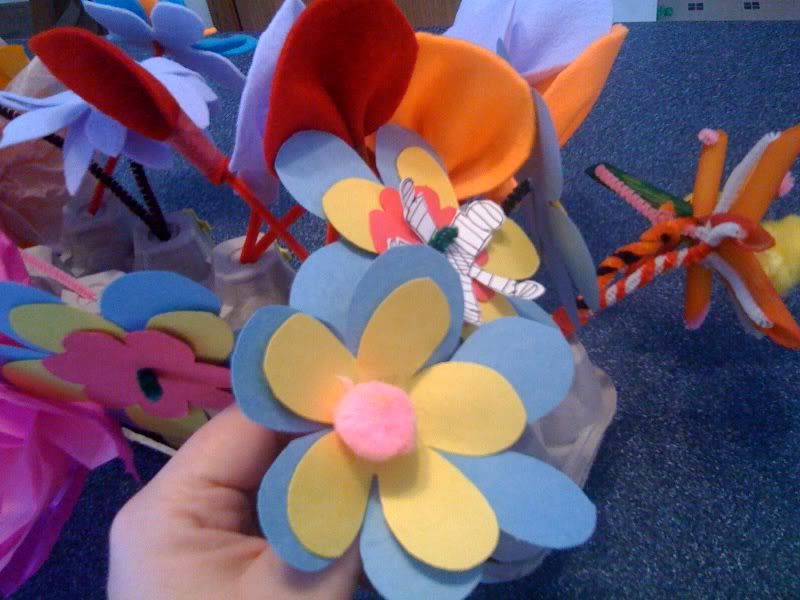
Construction Paper Flowers:
constriction paper in several colors
pipe cleaner
pompoms (optional)
scissors
The Craft:
Felt Flowers:

Templates: (to come!)

The Rhyme:
Mary, Mary, quite contrary,
How does your garden grow?
With silver bells and cockle shells,
And little maids, all in a row.
Age: 4 & up
Difficulty rating: 2-3 out of 5 (depends on the flower)
Messiness rating: moderate
Time: 10-15 min
Supplies:
egg carton
the rest depends on the flowers you want to create.
Felt Flowers:
Felt
Scissors
Pipe cleaner
pompoms (optional)
tape (for cockle-shells)
Tissue Paper Flowers:
Tissue paper squares, 4 layers for each flower, roughly 5x5.
Pipe cleaner
scissors
Noodle Flowers:
penne, macaroni or some other hollow noodle
food coloring
plastic baggies (one for each color)
pipe cleaners
pompoms (optional)
Construction Paper Flowers:
constriction paper in several colors
pipe cleaner
pompoms (optional)
scissors
The Craft:
- Poke holes in the bottom of the egg carton. This is going to be the garden.
- Assemble each flower (directions to follow). We put one to two in each hole.
- Some flowers will need extra pipe cleaners. Some are just plain heavy!
Felt Flowers:

- Cut out a basic flower shape. (I will add templates when I have more time!)
- Cut out a smaller version of the same shape.
- Cut two slits in the center of the flower.
- Slip the pipe cleaner through one slit in the larger flower, through one in the smaller flower, go across the top of the flower to the second slit in the smaller flower and go down through that and the second slit in the larger flower.
- If desired, glue a pompom in the middle.

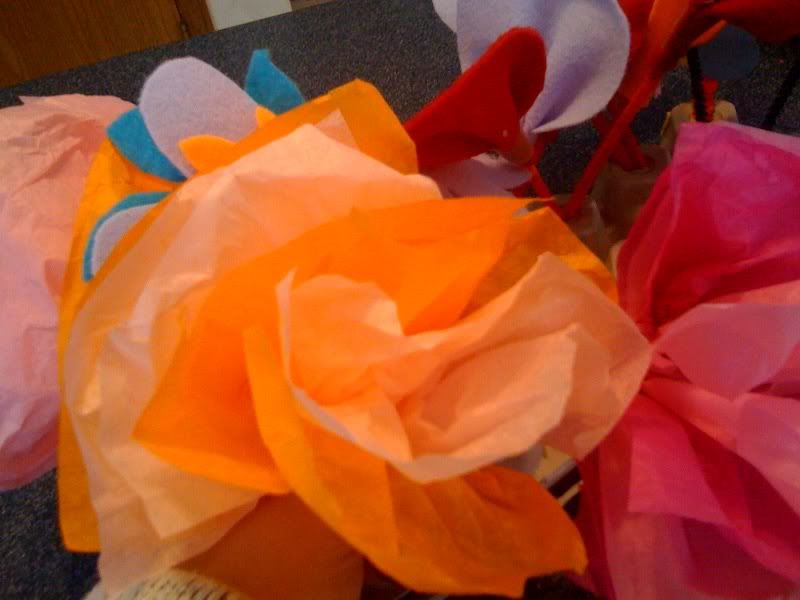
- Layer four or five pieces of tissue paper on each other. They should all be about the same size. 5x5 is a nice sized flower when done.
- Fold all pieces accordion style, starting at one end and finishing at the other.
- Cut a notch out of both sides at the center of the accordion.
- Wrap the pipe cleaner around the notched section.
- Carefully tease apart the individual pieces of tissue paper, pulling them in toward the center.

- These were the hardest, for size and weight reasons alone. But they are the ones the kids enjoyed making the most.
- Put a small amount of pasta in a sealable bag.
- Add a few drops of food coloring (more if you want a darker color) to the bag and shake, shake, shake!
- Set the pasta out on a piece of paper to dry--generally pretty fast. I think we waited 5-10 minutes at most.
- Okay, here is the tricky part. What I did was I took 2 pipe cleaners and twisted them in the middle, so there were four "branches."
- I then added a third pipe cleaner, also twisting it in the middle. There are now six "branches" to the flower.
- Put one piece of pasta (more if it is small) on each pipe cleaner. Leave ample room at the end of the "petal" to bring it back around to the middle.
- Bring the remaining part of the pipe cleaner back around to the middle and twist it in the middle.
- Do this for each petal.
- Run a pipe cleaner from one side of the flower to the other, going through the middle.
- Twist this around itself (like you are making a pipe cleaner candy cane). You might need to add another for support. Pasta is heavy.
- Glue a pompom in the middle to hide the pipe cleaners.

- Cut out a basic flower shape.
- Cut out a smaller version of the same shape.
- Put the smaller flower on top of the bigger one.
- Use a pair of scissors to (carefully!!) poke a hole in the center of both flowers.
- Slip the pipe cleaner through the hole in the larger flower, then through the one in the smaller flower.
- Wrap it on itself to make a "ball" for the center of the flower.
- If desired, glue a pompom in the middle.
Templates: (to come!)
Thursday, January 7, 2010
Hey Diddle Diddle
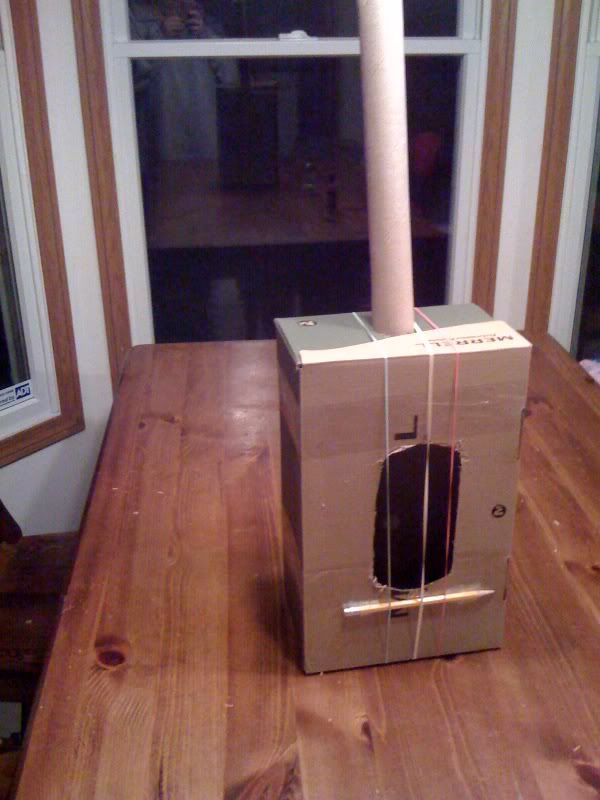
Oh the options for this craft abound! I am torn between making a play guitar, erm, fiddle, a paper plate cow & moon or a construction paper scene with moving cow. Since we just did a moving craft, I am torn between the paper plate craft and the guitar...but the guitar wins (thanks for the idea, Lissi)! I can easily use paper plates to make another craft one day (probably soon!)
The Rhyme:
Hey Diddle Diddle,
The Cat and the fiddle.
The cow jumped over the moon.
The little dog laughed to see such a sight,
And the dish ran away with the spoon.
Age: 4 & up
Difficulty rating: 1 out of 5
Messiness rating: minimal
Supplies:
Tissue Box or Shoe Box
3-5 rubber bands
Paper towel roll
Pencil
Tape or glue (optional)
Decorations!
The Craft:
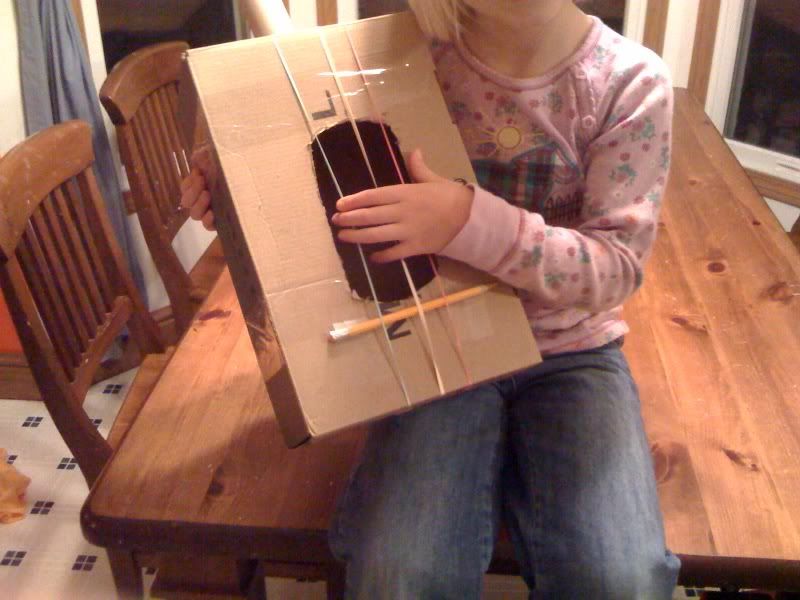
Here's mine!

The Rhyme:
Hey Diddle Diddle,
The Cat and the fiddle.
The cow jumped over the moon.
The little dog laughed to see such a sight,
And the dish ran away with the spoon.
Age: 4 & up
Difficulty rating: 1 out of 5
Messiness rating: minimal
Supplies:
Tissue Box or Shoe Box
3-5 rubber bands
Paper towel roll
Pencil
Tape or glue (optional)
Decorations!
The Craft:
- Tape the box closed.
- Cut a hole in the lid of the box. I made mine about 2" by 6". But the shoebox I used was large.
- Carefully place the rubber bands around the box so they are vertical across the opening.
- Trace the circle of the paper towel tube on the top of the box.
- Cut out the circle.
- Insert the paper towel roll into the hole.
- Place a pencil under the rubber bands at the bottom of the hole.
- Decorate. Bonus points for using cows, spoons, moons, cats, dogs and stars.
- Send in your pictures! I want to see them!
Here's mine!

Wednesday, January 6, 2010
This Little Piggy
The Rhyme:
This little piggy went to market;
This little piggy stayed home;
This little piggy had roast beef;
This little piggy had none;
This little piggy went "whee, whee, whee" all the way home.
Age: 2 & up
Difficulty rating: 1 out of 5
Messiness rating: minimal
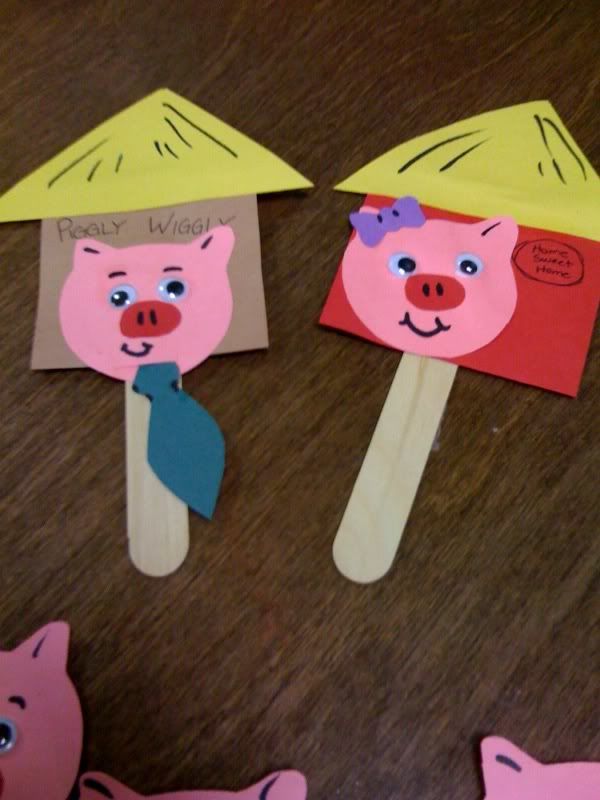
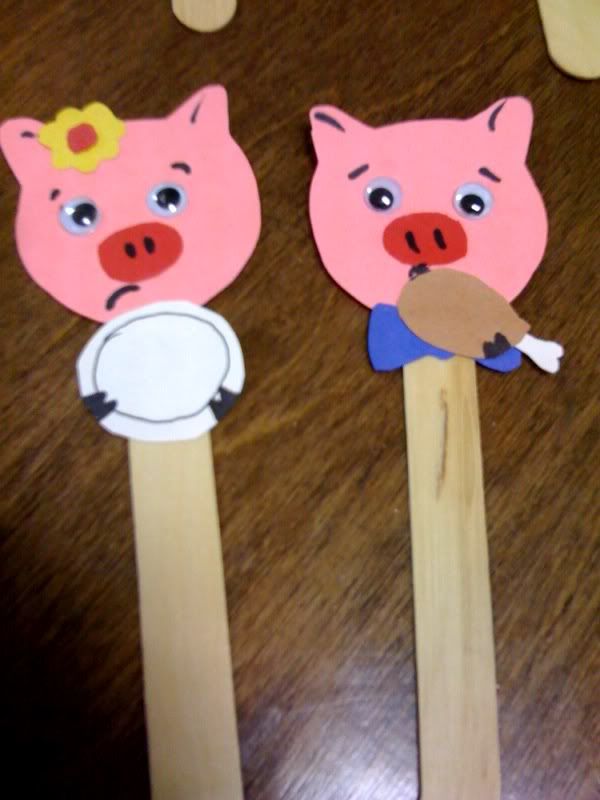
This craft rewards you with cute puppets for a puppet show! Plus it combines kiddie favorites--gluing and gluing. Big hit! The kids can also help cut out the figures.
5 jumbo craft sticks
Construction paper (pink, and any other color you feel like using. I used brown, purple, green, red, yellow, and so forth. Scraps are plenty--except for the pink.)
Googly Eyes (I love me some googly eyes, can you tell?)
Craft Glue
Black Marker
The Craft:
- Cut out the basic shape of a pig's head. (You can use the template here, if you want.)
- Cut out the noses.
- Cut out any additional shapes you might want to add. I used a bow-tie, a bow, a flower, a plate, roast beef (though it looks more like a turkey leg!), a necktie, a large square for the house & store and triangle roofs.)
- Glue on the googly eyes.
- Glue on the noses.
- Glue on the "extras."
- Glue it all to the craft sticks.

Tuesday, January 5, 2010
Girly Craft! Part 1
(Already straying from the plan, but this one was written a few weeks ago, so I should use it!)
So, I have a daughter who is approaching seven. (EEK!!) She is the only girl in our family (well, other than myself) and I like to give her girly things. So, I came up with the idea to make her homemade barrettes. I have purchased a crap-ton (a real amount, mind you!) of barrette blanks. Only to realize I have NO idea how to move from ribbon scraps and barrette blanks to a pretty barrette crafted with love and hot-glue. So, while I am figuring THAT out, I figured I would let her and I make a place to PUT the barrettes.
Materials:
2 Wooden cut-outs, the kind readily available at JoAnn's and Michael's, in a shape that catches your fancy.
Ribbon, in a coordinating color/pattern
Hot Glue
Paints
Felts
Other embellishments you see fit to add to wood cut outs. Googly eyes make a cute addition for things that need/want eyes.
newspaper
Well, there is a cheat to this. There are already painted and embellished cut-outs available for purchase. So you can get those and skip the next part--but where is the fun in that, I ask you! Where? (Funny story. My daughter picked the pre-painted ones and refused to pick blank ones. So, I had to skip that bit of fun myself. :( )
The Craft:
1. Lay out newspaper to cover your work surface. Or not. I mean, maybe you just don't care if a painting/glue mess ensues. I know I generally skip this step...and my kitchen table will prove it!
2. Arm your child with paint and brushes. Have them paint said wood cutouts.
3. Let the paint dry.
4. Embellish away, if that is what you want. Some ideas: if you have a lion, cut out a felt mane. Or a collar for a dog. And googly eyes. Everything could use a few googly eyes. A tiara? Skip the eyes and add gems and glitter. For decoration ideas, roam the cutout aisle of the craft store and ask yourself: could we do that? The answer? Of course!!
5. For ADULTS: Cut the ribbon to the length you wish. I think a yard provides MORE than enough room for a lion's share of barrettes. (And lions could wear a ton, if they were a. female and b. not likely to eat the one-who-puts-barrettes-in-a-lion's-mane. I mean, LOOK at all the hair they have!) We started with a half yard.
6. ADULTS: Hot glue the ribbon to the back of the wood cutouts. Glue on on top and one on the bottom.
7. Glue a hanger on the back. I forgot to buy any so we used a safety pin. Works.
8. Let glue dry, and voila! There is the ribbon holder.
I'll be back for Girly Craft Part 2 as soon as I figure out how to make bows....
Sunday, January 3, 2010
Mary Had a Little Lamb, Part One: The Lamb
So, the Hickory Dickory post got me thinking, and I think what I am going to do is post a book a day (or story) with a related craft. See, I am all about getting kids INVOLVED in literature (see over at Maude's blog as proof of that!) and I can't think of a better way to do that than to read a story, then do an associated craft. Then as you are working on the craft you can talk about what part of the story you are representing in the craft and all that.
Since Hickory Dickory was a nursery rhyme, this week we will be doing nursery rhymes!
Mary Had a Little Lamb, Part One: The Lamb
The Rhyme:
Mary had a little lamb, little lamb, little lamb.
Mary had a little lamb, its fleece was white as snow.
Everywhere that Mary went, Mary went, Mary went,
Everywhere that Mary went the lamb was sure to go.
Age: 2 & up
Difficulty rating: 1 out of 5 (younger kids need more help)
Messiness rating: minimal
Supplies Needed:
Toilet Tissue Roll or four
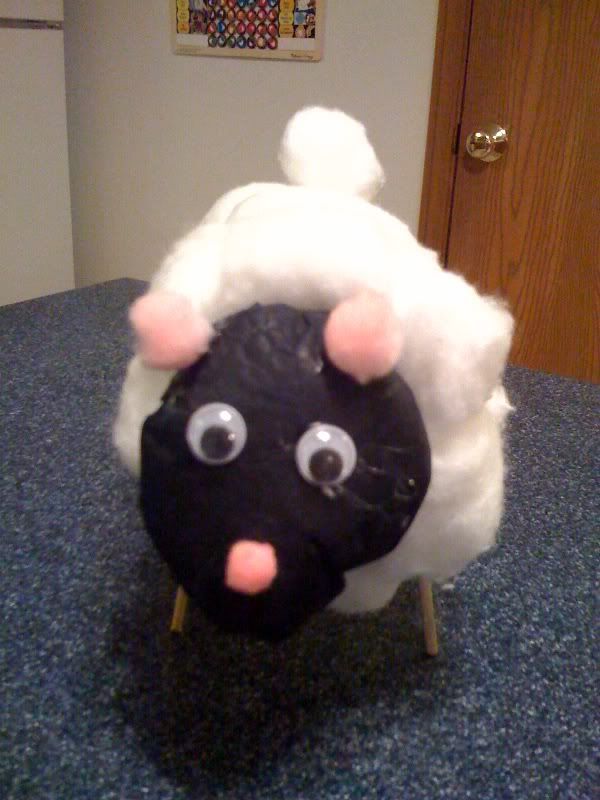
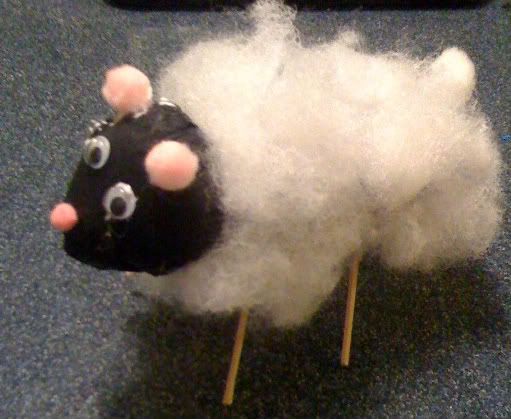
Fluff Cotton Balls (Cotton Balls are what I had in mind, but I didn't have any so I used Fiberfill. Big mistake! The lamb pictured above is the *new* lamb I made with cotton balls. MUCH better!)
Dowel Rod, Toothpicks or Pipe Cleaners (these will be legs)
Googly Eyes
Craft Glue
Plain tissue paper, tissues or paper towels--enough to stuff the toilet tissue roll
Tape
Four pompoms (I used one white and three pink)
Steps:
Seriously. Use cotton balls. I am still picking fiberfill off my hands!
I remade the lamb after the fiberfil disaster. Check out the difference!! The cotton balls are SO much cuter! And easier!
Before:
After:

MUCH better, no?
Since Hickory Dickory was a nursery rhyme, this week we will be doing nursery rhymes!
Mary Had a Little Lamb, Part One: The Lamb

The Rhyme:
Mary had a little lamb, little lamb, little lamb.
Mary had a little lamb, its fleece was white as snow.
Everywhere that Mary went, Mary went, Mary went,
Everywhere that Mary went the lamb was sure to go.
Age: 2 & up
Difficulty rating: 1 out of 5 (younger kids need more help)
Messiness rating: minimal
Supplies Needed:
Toilet Tissue Roll or four
Dowel Rod, Toothpicks or Pipe Cleaners (these will be legs)
Googly Eyes
Craft Glue
Plain tissue paper, tissues or paper towels--enough to stuff the toilet tissue roll
Tape
Four pompoms (I used one white and three pink)
Steps:
- Stuff the empty tube with tissue paper, tissues or paper towel.
- Put tissue paper over one end of the tube and glue it on.
- Stuff the tube with tissue. Fill it so there is some coming out the other end of the tube about 2 inches.
- Cover the overstuffed end with tissue too. There should be a bulge in the tissue--this is the head. I used black in the sample, because I did not have white.
- Cut four slits in the underside of the tube. The legs will be inserted here. Alternately, you can tape them to the outside of the roll.
- Cover the toilet tissue roll in glue.
- Attach the cotton balls or fluff. Trust me--cotton balls will work WAY better. My sheep looks like it has mange--poor sheep.
- Stick the legs in the holes in the bottom.
- Glue googly eyes on the face.
- Glue two pompoms on for the ears, one for the tail and one for the nose. I found it easier to put the glue on the pompom first, then apply it to the sheep.
- Let sheepy dry! If you want, make a whole flock for Mary to watch!
Seriously. Use cotton balls. I am still picking fiberfill off my hands!
I remade the lamb after the fiberfil disaster. Check out the difference!! The cotton balls are SO much cuter! And easier!
Before:

After:

MUCH better, no?
Mary Had a Little Lamb, Part Two: Mary
Before I start this craft, I want to digress for a moment and talk about how important it is to follow your bliss--do what makes you happy. As most of you know, for the past year I have been doing crafts every Tuesday at the most excellent Sprout Soup store. I really love doing crafts--and even better, helping KIDS do crafts. The joy they get out of taking something mundane, such as a toilet paper tube and turning it into something adorable is just priceless. So that has been part one of following my bliss.
Then, I decided that I wanted to help more people craft with their kids. So many parents don't take the time to let their kids make a mess and I think this is sad. So, I started blogging about it. It was nice to do something everyday (though I admit a tad overwhelming at times). My kids love it and I love it. We grow closer together as a family and spend time with each other that might otherwise have been wasted. This makes me happy too. So this blog is helping me marry my love of crafts, my love of writing and my love of spending time with my kids. What could be better. THIS is my bliss. And I love you for sharing it with me. :)
Dare I say my end goal would be to get a book published about crafting with kids? Maybe I dare not say it. Doesn't change the fact that it IS my end goal...and the pot at the end of the rainbow!
(For more information about following your bliss and the “A Great Day / Blissdom Conference Pass Giveaway”, check out this website!)
Aside over--now let's get on to making Mary!
The Rhyme:
Mary had a little lamb, little lamb, little lamb.
Mary had a little lamb, its fleece was white as snow.
Everywhere that Mary went, Mary went, Mary went,
Everywhere that Mary went the lamb was sure to go.
Age: 4 & up, younger with help
Difficulty rating: 3 out of 5 (younger kids need more help)
Messiness rating: minimal
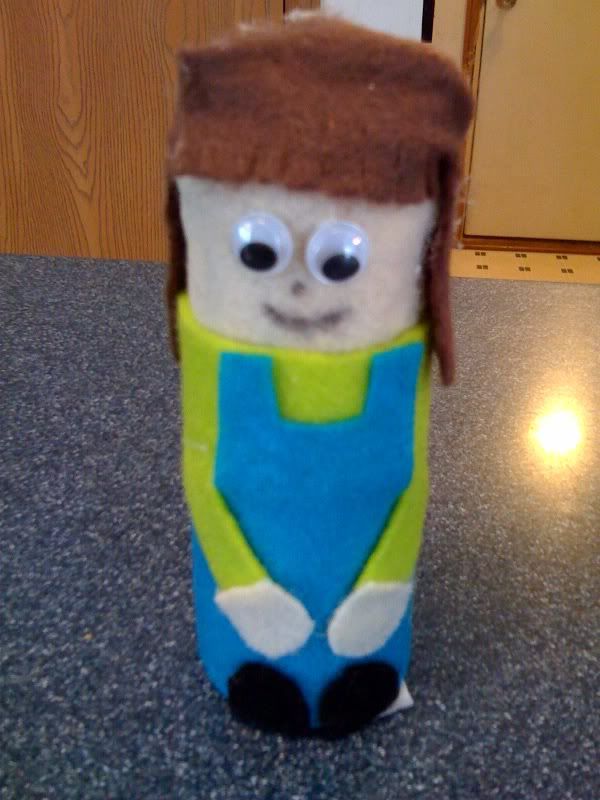
Yesterday we made the lamb...today we make Mary. I admit, I am floundering a little as how to do this. Toilet tissue roll to make it proportional? Or clothes pin to make it easier?
Hm.
Alright, toilet tissue roll it is! Can't have Mary being overshadowed by the lamb, can we now?
Supplies:
Toilet Tissue Roll
Felt--for face & hands, dress, hair (alternately could use yarn or ribbon for hair, and fabric scraps for the dress) Or construction paper for all
Craft glue
Googly eyes
Tissue to stuff in tube
Template (see below...still need to work on THAT)
Marker for face
The Craft:
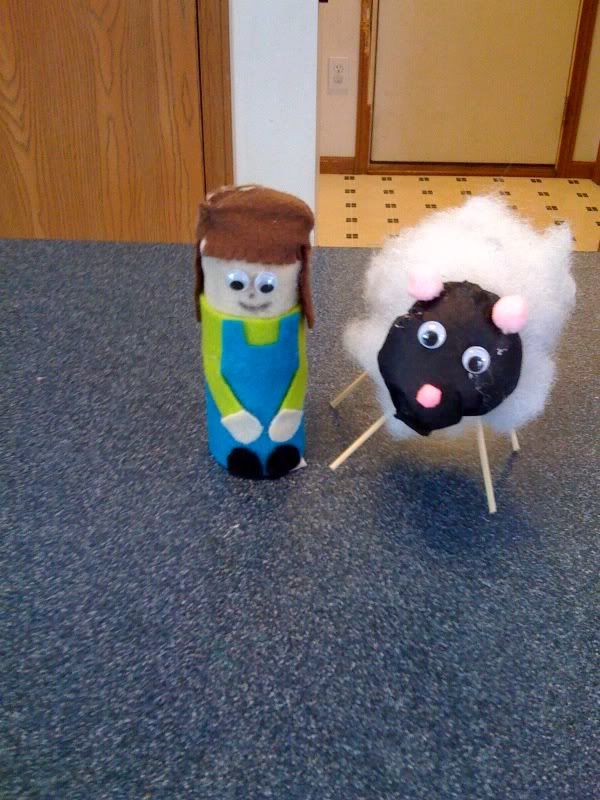
And there you have Mary. Put her together with the sheep you made yesterday and let the shenanigans begin!
(And no, the lamb is not drunk, just listing severely. I think I need to make a different lamb. SO unhappy with this mangy one!)
TEMPLATES:


Then, I decided that I wanted to help more people craft with their kids. So many parents don't take the time to let their kids make a mess and I think this is sad. So, I started blogging about it. It was nice to do something everyday (though I admit a tad overwhelming at times). My kids love it and I love it. We grow closer together as a family and spend time with each other that might otherwise have been wasted. This makes me happy too. So this blog is helping me marry my love of crafts, my love of writing and my love of spending time with my kids. What could be better. THIS is my bliss. And I love you for sharing it with me. :)
Dare I say my end goal would be to get a book published about crafting with kids? Maybe I dare not say it. Doesn't change the fact that it IS my end goal...and the pot at the end of the rainbow!
(For more information about following your bliss and the “A Great Day / Blissdom Conference Pass Giveaway”, check out this website!)
Aside over--now let's get on to making Mary!
The Rhyme:
Mary had a little lamb, little lamb, little lamb.
Mary had a little lamb, its fleece was white as snow.
Everywhere that Mary went, Mary went, Mary went,
Everywhere that Mary went the lamb was sure to go.
Age: 4 & up, younger with help
Difficulty rating: 3 out of 5 (younger kids need more help)
Messiness rating: minimal
Yesterday we made the lamb...today we make Mary. I admit, I am floundering a little as how to do this. Toilet tissue roll to make it proportional? Or clothes pin to make it easier?
Hm.
Alright, toilet tissue roll it is! Can't have Mary being overshadowed by the lamb, can we now?
Supplies:
Toilet Tissue Roll
Felt--for face & hands, dress, hair (alternately could use yarn or ribbon for hair, and fabric scraps for the dress) Or construction paper for all
Craft glue
Googly eyes
Tissue to stuff in tube
Template (see below...still need to work on THAT)
Marker for face
The Craft:
- Cut out body, hair, top, bottom, shoes and hands.
- Assemble the top & bottom--but do not put on the tissue tube yet. They fit together like a puzzle piece, with the arms coming down on either side of the overall bib.
- Glue those pieces to the body piece, making sure you are putting the "clothes" on at the bottom and leaving room for the head.
- Glue on the hands and the shoes.
- Glue the body & etc to the tissue tube.
- Now, comes the hair. I fringed the "bangs" so they would look better.
- Glue the front of the hair on the front of the doll, right above where her eyes will be.
- Glue the back of the hair on the back of the doll.
- Use the side "tabs" to round off the squareness of the hair and cover the opening of the tissue tube. An adult might have to do this--this is a tricky step.
- Glue on the googly eyes.
- Draw on her face.

And there you have Mary. Put her together with the sheep you made yesterday and let the shenanigans begin!
(And no, the lamb is not drunk, just listing severely. I think I need to make a different lamb. SO unhappy with this mangy one!)
TEMPLATES:


Saturday, January 2, 2010
Hickory Dickory Dock
Age: 4 & up, younger with help
Difficulty rating: 3 out of 5 (younger kids need more help)
Messiness rating: minimal
Simple, cute and quick, this craft takes the old nursery rhyme Hickory Dickory and brings it to life!
Hickory Dickory Dock.
The mouse ran up the clock.
The clock struck one,
And down he run.
Hickory Dickory Dick.
The mouse can move up and down the string, letting it run "up the clock" for a visual component to the rhyme. We had a ton of fun with this craft--thought I must say it is not all that easy for tiny hands. But with help, you can have a cute-as-can-be puppet too!
Materials needed:
Construction paper: brown, yellow, gray (or blue), red and white
Scissors (should be pretty sharp)
Craft knife (to make things easier!)
Whole punch
Yarn
We actually did not have a craft knife or a hole punch, but they would have been nice! Scissors will do for all you need.

The Craft:
1. Cut out the following:
*teardrop shape in gray (we used blue since we didn't have gray)
*Rectangle in brown
*Decorative pieces for the top and bottom of the clock in brown
*Ears in red
*Middle rectangle in yellow
*Clock face in white
2. Draw a face on the mouse. If you have some small enough googly eyes, those would be epic.
3. Draw the numbers on the clock face.
4. Glue the clock face, the top and bottom decorations and the smaller rectangle on the larger rectangle.
5.Fold the mouse shape in half, and cut (carefully) along the lines. This is made tons easier with a craft knife--for adults, obviously.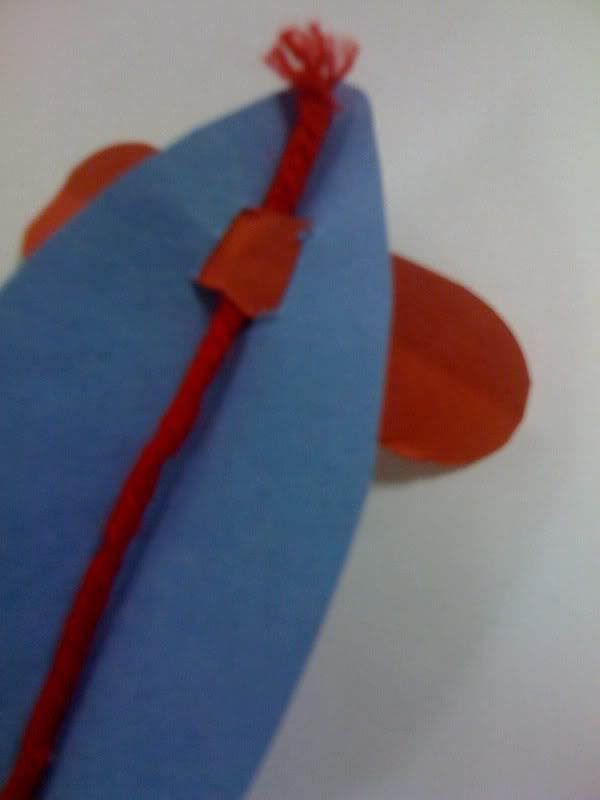
6. Fold the ears in half, lengthwise. Slip them through the slits made in the mouse.
7. Run a 12" (or so)piece of yarn through the "loop" on the back of the mouse where the ears are.
8. Poke a hole in the bottom of the mouse.
9. Cut a 3" piece of yarn and tie a knot in one end.
10. Run the unknotted end through the back of the hole and out the front. The knot, which should be on the back, will hold the yard in place as the tail of the mouse.
11. Punch a hole (with a hole punch, or scissors) in at the top of the clock. We put ours between the middle of the clock and the face of the clock. If you punch it where there are two layers of construction paper, the final product will be sturdier.
12. Punch a hole at the bottom of the clock also.
13. Take the yarn that is behind the mouse's ears and stick one end in the top hole, and the other end in the bottom hole.
14. Tie in the back.
And there you have it! Your Hickory Dickory Dock Mouse puppet! I really liked how these turned out, personally. :) Hope you do too!
Here is a template: (which clearly needs help, but if you click on it it brings up a larger version, which maybe you can print from there? Until I get it fixed, I guess you could copy, paste in word or paint and print. Sorry for that.)

Difficulty rating: 3 out of 5 (younger kids need more help)
Messiness rating: minimal
Simple, cute and quick, this craft takes the old nursery rhyme Hickory Dickory and brings it to life!
Hickory Dickory Dock.
The mouse ran up the clock.
The clock struck one,
And down he run.
Hickory Dickory Dick.
The mouse can move up and down the string, letting it run "up the clock" for a visual component to the rhyme. We had a ton of fun with this craft--thought I must say it is not all that easy for tiny hands. But with help, you can have a cute-as-can-be puppet too!
Materials needed:
Construction paper: brown, yellow, gray (or blue), red and white
Scissors (should be pretty sharp)
Craft knife (to make things easier!)
Whole punch
Yarn
We actually did not have a craft knife or a hole punch, but they would have been nice! Scissors will do for all you need.

The Craft:
1. Cut out the following:
*teardrop shape in gray (we used blue since we didn't have gray)
*Rectangle in brown
*Decorative pieces for the top and bottom of the clock in brown
*Ears in red
*Middle rectangle in yellow
*Clock face in white
2. Draw a face on the mouse. If you have some small enough googly eyes, those would be epic.
3. Draw the numbers on the clock face.
4. Glue the clock face, the top and bottom decorations and the smaller rectangle on the larger rectangle.
5.Fold the mouse shape in half, and cut (carefully) along the lines. This is made tons easier with a craft knife--for adults, obviously.

6. Fold the ears in half, lengthwise. Slip them through the slits made in the mouse.
7. Run a 12" (or so)piece of yarn through the "loop" on the back of the mouse where the ears are.
8. Poke a hole in the bottom of the mouse.
9. Cut a 3" piece of yarn and tie a knot in one end.
10. Run the unknotted end through the back of the hole and out the front. The knot, which should be on the back, will hold the yard in place as the tail of the mouse.
11. Punch a hole (with a hole punch, or scissors) in at the top of the clock. We put ours between the middle of the clock and the face of the clock. If you punch it where there are two layers of construction paper, the final product will be sturdier.
12. Punch a hole at the bottom of the clock also.
13. Take the yarn that is behind the mouse's ears and stick one end in the top hole, and the other end in the bottom hole.
14. Tie in the back.
And there you have it! Your Hickory Dickory Dock Mouse puppet! I really liked how these turned out, personally. :) Hope you do too!
Here is a template: (which clearly needs help, but if you click on it it brings up a larger version, which maybe you can print from there? Until I get it fixed, I guess you could copy, paste in word or paint and print. Sorry for that.)

Friday, January 1, 2010
Ribbons, ribbons everywhere...
What can you do with all the leftover holiday ribbons? Make a grand mess craft, of course! Set yourself up with some glue paste (50/50 glue and water), a balloon and the excess ribbon and make yourself a decorative bowl!
Materials:
Craft glue
Ribbons
Balloon
1. Blow up the balloon to the size you wish the bowl to be. I chose a smallish size, since I was not sure how it would work out or how we would like it.
2. Now the fun begins! Dip the ribbon in the glue mixture to coat the ribbon with glue.
3. Pull the ribbon back out of themess glue mixture, running it through your fingers to remove the excess glue.
4. Tricky part. Put the ribbon on the balloon. I know, it doesn't *sound* hard. I went into this with a sense of 'this is easy' that was quickly dispelled as the project progressed. It is not *hard* per se, it just requires more planning that *I* had originally allotted, resulting in a bigmess learning opportunity for all involved! There are some TIPS, which I have placed at the end of the post so I do not break up the action of the "How To" post by random rambling.
5. Layer, layer, layer! Cover the balloon in many layers of ribbon, covering all empty spaces.
6. Let dry for 24 hours.
7. Pop the balloon and admire your artwork!
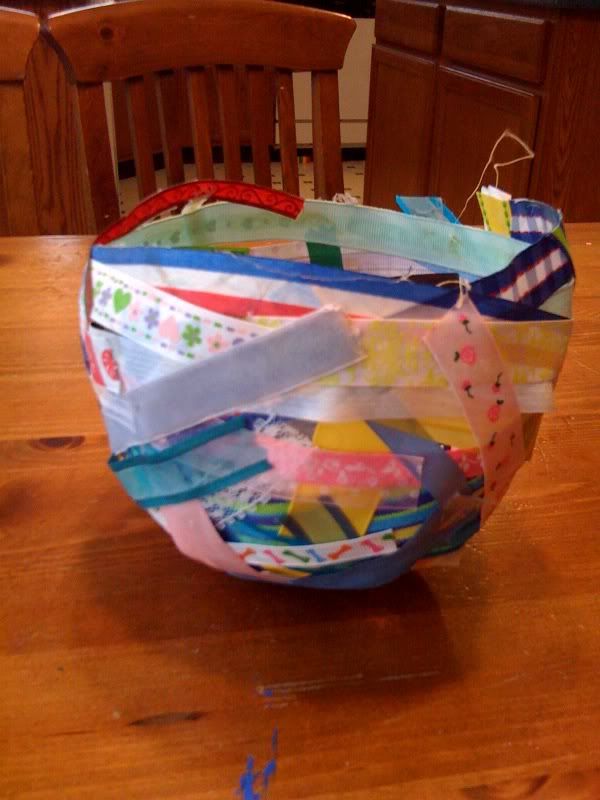
TIPS:
1. Put the balloon firmly in a bowl to hold it still. As the ribbon is applied to the balloon, the weight changes. If the bowl is not heavy (disposable bowls are most definitely not!) the balloon tips over and makes themess crafting space even bigger! To weight the bowl, I threw in some pennies in the bottom of the container and stuck the balloon in there but good.
2. Use a dark color balloon to make it easy to see where more ribbon needs placed. I used a white one initially and, well, we had to go back in and repair spots.
3. The bottom of a balloon is round. The bottom of your bowl will be round. It does not stay put well. I recommend placing heavy objects in the bottom to make it stay put.
4. DO NOT USE velvety ribbon or ribbon with a vinyl backing. It does *not* adhere well, says someone who tried. What amess learning adventure that was.
Materials:
Craft glue
Ribbons
Balloon
1. Blow up the balloon to the size you wish the bowl to be. I chose a smallish size, since I was not sure how it would work out or how we would like it.
2. Now the fun begins! Dip the ribbon in the glue mixture to coat the ribbon with glue.

3. Pull the ribbon back out of the
4. Tricky part. Put the ribbon on the balloon. I know, it doesn't *sound* hard. I went into this with a sense of 'this is easy' that was quickly dispelled as the project progressed. It is not *hard* per se, it just requires more planning that *I* had originally allotted, resulting in a big
5. Layer, layer, layer! Cover the balloon in many layers of ribbon, covering all empty spaces.

6. Let dry for 24 hours.
7. Pop the balloon and admire your artwork!

TIPS:
1. Put the balloon firmly in a bowl to hold it still. As the ribbon is applied to the balloon, the weight changes. If the bowl is not heavy (disposable bowls are most definitely not!) the balloon tips over and makes the
2. Use a dark color balloon to make it easy to see where more ribbon needs placed. I used a white one initially and, well, we had to go back in and repair spots.
3. The bottom of a balloon is round. The bottom of your bowl will be round. It does not stay put well. I recommend placing heavy objects in the bottom to make it stay put.
4. DO NOT USE velvety ribbon or ribbon with a vinyl backing. It does *not* adhere well, says someone who tried. What a
Subscribe to:
Comments (Atom)

