Wednesday, January 13, 2010
We interrupt this blog...
So, apparently it is easy to blog daily when you are on vacation, but once real life pops in and makes a show of it, it becomes more difficult. But I still want to do THIS blog daily (or at least have daily posts). So I am going to most likely do the work on the weekends when I have more time to play with the kids, and have scheduled postings. I do have the theme for this week worked out, with lots of very cool crafts. I hope to get on them tomorrow...so, hang tight. You are not forgotten. :)
Green Eggs and Ham
This is an awesome craft that is fun and easy to do, plus it becomes a fun game you can play for hours afterward. It can enhance word recognition, learning rhymes and fine motor skills.
Age: 2 & up
Difficulty rating: 1 out of 5
Messiness rating: minimal
Time: 10 minutes
Supplies:
Coffee Can or large tin can
13 Clothes Pins (either kind--spring or no)
Craft glue
print out pictures
paint (optional)
Decorations for can (optional)
The Rhymes:
Here/There
House/Mouse
Fox/Box
Car
Boat/Goat
Train/Rain
Dark
Tree
The Craft
Pictures and templates:
to come soon!
Age: 2 & up
Difficulty rating: 1 out of 5
Messiness rating: minimal
Time: 10 minutes
Supplies:
Coffee Can or large tin can
13 Clothes Pins (either kind--spring or no)
Craft glue
print out pictures
paint (optional)
Decorations for can (optional)
The Rhymes:
Here/There
House/Mouse
Fox/Box
Car
Boat/Goat
Train/Rain
Dark
Tree
The Craft
- If you are going to paint the clothes pins, do this first.
- Print out and have your child color the pictures.
- Cut out the pictures and glue them to each clothes pin.
- As you read the story, you can have the child put the pins on the can as the rhyme moves along, or you can have the child match the rhyming words.
- You can also write the word on the bottom of the clothes pin to start to teach word recognition.
- You can have the child decorate the tin with tissue paper and a 50/50 glue water mixture, but this bumps up the messiness rating to like 7 out of 5. The kiddo would paint the tin with the glue mixture and apply the tissue/wrapping paper to the outside. Let dry thoroughly before putting the pins on the tin.
Pictures and templates:
to come soon!
Monday, January 11, 2010
Cat in the Hat
Now we will start doing books! I borrowed the idea from Jocelyn over at http://beinglds.blogspot.com. She did the book a day over the Christmas holidays and I thought it was brilliant, so ya know, they say imitation is the best form of flattery and all that.
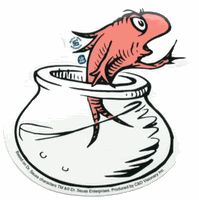
So, we have all read the Cat in the Hat, right? The craft possibilities for this are limitless..but I personally am a huge fan of the fish. So, we did a fishy craft.
Age: 3 & up
Difficulty rating: 2 out of 5
Messiness rating: minimal
Time: 10 minutes
Supplies:
Dixie cup or small cup
Cut out picture of the fish (you can trace it, print it or enlarge it too)
Craft stick
Blue tissue paper for water
White tissue paper
Construction paper, or cardboard paper
The Craft:
So, we have all read the Cat in the Hat, right? The craft possibilities for this are limitless..but I personally am a huge fan of the fish. So, we did a fishy craft.
Age: 3 & up
Difficulty rating: 2 out of 5
Messiness rating: minimal
Time: 10 minutes

Supplies:
Dixie cup or small cup
Cut out picture of the fish (you can trace it, print it or enlarge it too)
Craft stick
Blue tissue paper for water
White tissue paper
Construction paper, or cardboard paper
The Craft:
- Cover the cup with white tissue paper.
- Cut out a spout and a handle.
- Cut a slit in the bottom of the cut for the craft stick.
- Glue the fish to the craft stick.
- Stick the craft stick through the slit, so the fish is in the "tea pot."
- Put blue tissue paper around it for the water in the pot.
- Move stick up and down as the fish pops in and out of the water!
Sunday, January 10, 2010
Humpty Dumpty
A tactile craft! Your kids will get to put Humpty Dumpty together again! Show them they can do better than ALL the king's horses and ALL the king's men! (But that isn't really fair, because just how much use is a horse in this situation anyway? Not like they have opposable digits or fine motor movements. Sheesh. Probably could have put Humpty back together before the horses tried to help!)


The Rhyme:
Humpty Dumpty sat on a wall.
Humpty Dumpty had a great fall.
All the kings horses and all the kings men
Couldn't put Humpty together again.
Age: 2 & up
Difficulty rating: 2 out of 5
Messiness rating: moderate potential
Time: 10 minutes
Supplies:
construction paper: white, red, blue, green, black
scissors
crayons
googly eyes
tactiles, such as rice, corn meal, crushed egg shells (not too small), etc.
yarn
pencil
The Craft:
- Cut out bricks, about 1" x 3". Depending on the size of your paper, you might need more or less. I made 8.
- Cut an oval, for Humpty.
- Take the oval and lay it on a piece of green paper. Trace the bottom 1/3 of the oval in pencil, and draw a straight line across the top.
- From this 1/3 oval, draw two rectangles off the bottom. These will be his pants.
- Cut a thin strip (about 1/2 inch thick and twice the width of your oval) of white. This will be his arms.
- Cut an oval in black, then cut that in half. These are his shoes.
- Cut two mitten shapes for gloves.
- Now that all the shapes are cut out, have your child glue the bricks on the blue background.
- Glue Humpty sitting on the wall.
- Glue on the arms (I glued them about 1/3 up from the bottom, at the top of his pants. The strip of arms goes under his pants.
- Only glue the arms on the "body" of the egg. Fold up what extends beyond the egg outline. I folded once at the "body" and once for the elbow.
- Glue on pants--just to the bottom of the oval.
- Fold the pants to show the knees.
- Glue the shoes on the pants.
- Glue on googly eyes, yarn mouth and nose (we drew ours on)
- Lay glue down as the "mortar" between the bricks and let the kids sprinkle sugar on it. The rough texture will represent the roughness of the brick wall.
- Glue egg shell pieces to the oval. The pieces should be small, but not too small. (I skipped this step because I did not have any eggs.)
- Apply glue over the bricks and sprinkle corn meal or something rough to give a gritty texture.
- Let dry. You now have a 3-D textile Humpty Dumpty poster.
Saturday, January 9, 2010
Little Boy Blue
To add to the musical-ness that all kids should enjoy, we are going to make a horn today. It is quite easy and quite fun.
The Rhyme:
Little Boy Blue come blow your horn,
The sheep's in the meadow,
The cow's in the corn.
Where is the little boy
Who looks after the sheep?
He's under a haystack,
Fast asleep.
Age: 2 & up
Difficulty rating: 1 out of 5
Messiness rating: minimal
Time: 5 minutes
Supplies:
Paper towel roll/toilet tissue roll
Wax paper (4" square)
Rubber Band
Pencil
Decorating items (Stickers, crayons, markers, etc.)
The Craft:
- Decorate the tube as desired.
- Poke holes in the tube, about 1 inch apart.
- Put the piece of wax paper over the end and secure it with a rubber band.
- Viola! Done! Now let the musical wonder play away!
Friday, January 8, 2010
Mary, Mary Quite Contrary
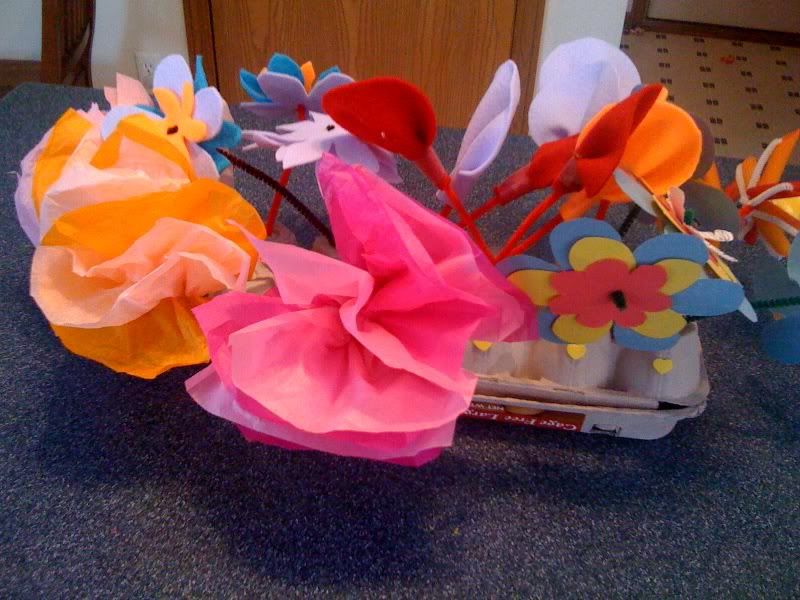
Snowbound? I know we are. So with the extra time today we made a flower garden--to brighten the dreary indoors and make spring seem more like a reality than a distant dream.
The Rhyme:
Mary, Mary, quite contrary,
How does your garden grow?
With silver bells and cockle shells,
And little maids, all in a row.
Age: 4 & up
Difficulty rating: 2-3 out of 5 (depends on the flower)
Messiness rating: moderate
Time: 10-15 min
Supplies:
egg carton
the rest depends on the flowers you want to create.
Felt Flowers:
Felt
Scissors
Pipe cleaner
pompoms (optional)
tape (for cockle-shells)
Tissue Paper Flowers:
Tissue paper squares, 4 layers for each flower, roughly 5x5.
Pipe cleaner
scissors
Noodle Flowers:
penne, macaroni or some other hollow noodle
food coloring
plastic baggies (one for each color)
pipe cleaners
pompoms (optional)
Construction Paper Flowers:
constriction paper in several colors
pipe cleaner
pompoms (optional)
scissors
The Craft:
Felt Flowers:

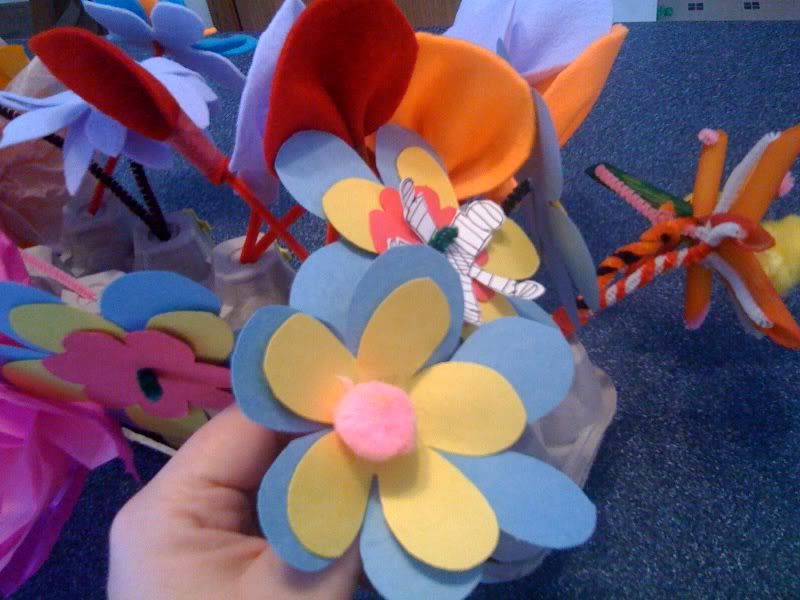
Templates: (to come!)

The Rhyme:
Mary, Mary, quite contrary,
How does your garden grow?
With silver bells and cockle shells,
And little maids, all in a row.
Age: 4 & up
Difficulty rating: 2-3 out of 5 (depends on the flower)
Messiness rating: moderate
Time: 10-15 min
Supplies:
egg carton
the rest depends on the flowers you want to create.
Felt Flowers:
Felt
Scissors
Pipe cleaner
pompoms (optional)
tape (for cockle-shells)
Tissue Paper Flowers:
Tissue paper squares, 4 layers for each flower, roughly 5x5.
Pipe cleaner
scissors
Noodle Flowers:
penne, macaroni or some other hollow noodle
food coloring
plastic baggies (one for each color)
pipe cleaners
pompoms (optional)
Construction Paper Flowers:
constriction paper in several colors
pipe cleaner
pompoms (optional)
scissors
The Craft:
- Poke holes in the bottom of the egg carton. This is going to be the garden.
- Assemble each flower (directions to follow). We put one to two in each hole.
- Some flowers will need extra pipe cleaners. Some are just plain heavy!
Felt Flowers:

- Cut out a basic flower shape. (I will add templates when I have more time!)
- Cut out a smaller version of the same shape.
- Cut two slits in the center of the flower.
- Slip the pipe cleaner through one slit in the larger flower, through one in the smaller flower, go across the top of the flower to the second slit in the smaller flower and go down through that and the second slit in the larger flower.
- If desired, glue a pompom in the middle.

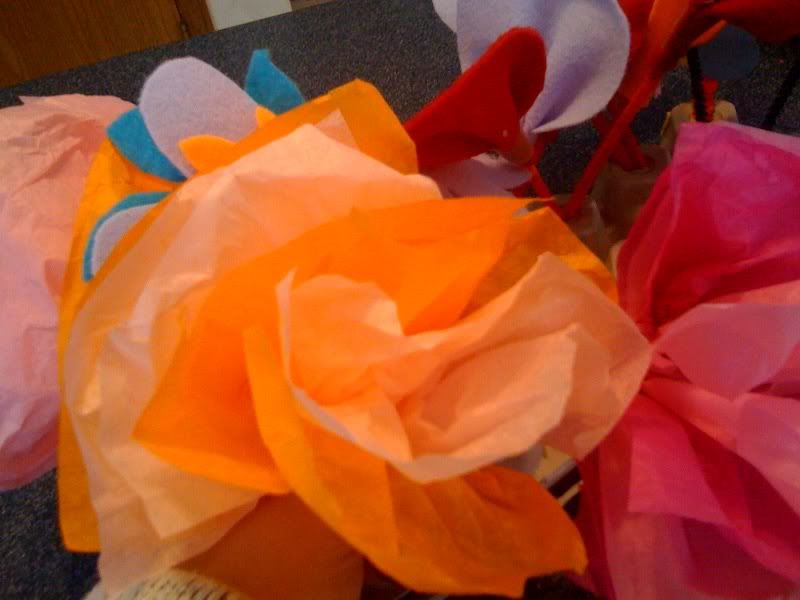
- Layer four or five pieces of tissue paper on each other. They should all be about the same size. 5x5 is a nice sized flower when done.
- Fold all pieces accordion style, starting at one end and finishing at the other.
- Cut a notch out of both sides at the center of the accordion.
- Wrap the pipe cleaner around the notched section.
- Carefully tease apart the individual pieces of tissue paper, pulling them in toward the center.

- These were the hardest, for size and weight reasons alone. But they are the ones the kids enjoyed making the most.
- Put a small amount of pasta in a sealable bag.
- Add a few drops of food coloring (more if you want a darker color) to the bag and shake, shake, shake!
- Set the pasta out on a piece of paper to dry--generally pretty fast. I think we waited 5-10 minutes at most.
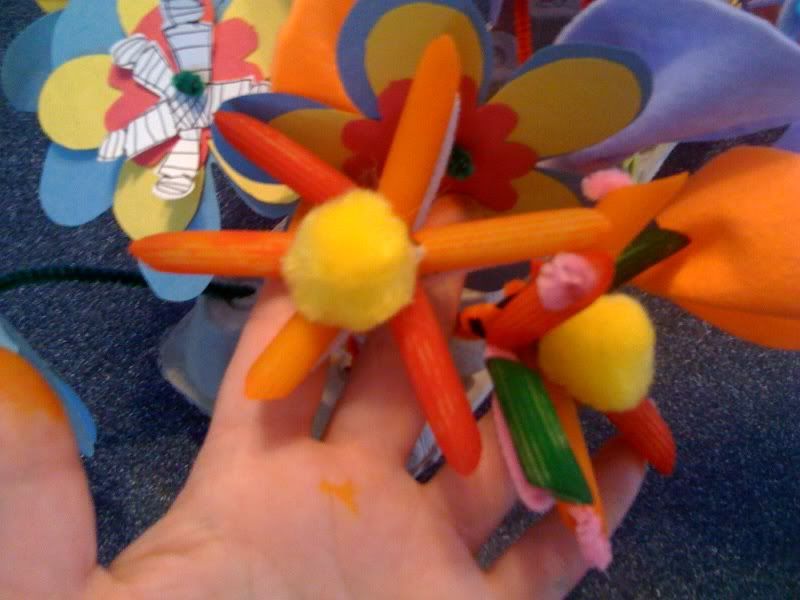
- Okay, here is the tricky part. What I did was I took 2 pipe cleaners and twisted them in the middle, so there were four "branches."
- I then added a third pipe cleaner, also twisting it in the middle. There are now six "branches" to the flower.
- Put one piece of pasta (more if it is small) on each pipe cleaner. Leave ample room at the end of the "petal" to bring it back around to the middle.
- Bring the remaining part of the pipe cleaner back around to the middle and twist it in the middle.
- Do this for each petal.
- Run a pipe cleaner from one side of the flower to the other, going through the middle.
- Twist this around itself (like you are making a pipe cleaner candy cane). You might need to add another for support. Pasta is heavy.
- Glue a pompom in the middle to hide the pipe cleaners.

- Cut out a basic flower shape.
- Cut out a smaller version of the same shape.
- Put the smaller flower on top of the bigger one.
- Use a pair of scissors to (carefully!!) poke a hole in the center of both flowers.
- Slip the pipe cleaner through the hole in the larger flower, then through the one in the smaller flower.
- Wrap it on itself to make a "ball" for the center of the flower.
- If desired, glue a pompom in the middle.
Templates: (to come!)
Thursday, January 7, 2010
Hey Diddle Diddle
Oh the options for this craft abound! I am torn between making a play guitar, erm, fiddle, a paper plate cow & moon or a construction paper scene with moving cow. Since we just did a moving craft, I am torn between the paper plate craft and the guitar...but the guitar wins (thanks for the idea, Lissi)! I can easily use paper plates to make another craft one day (probably soon!)
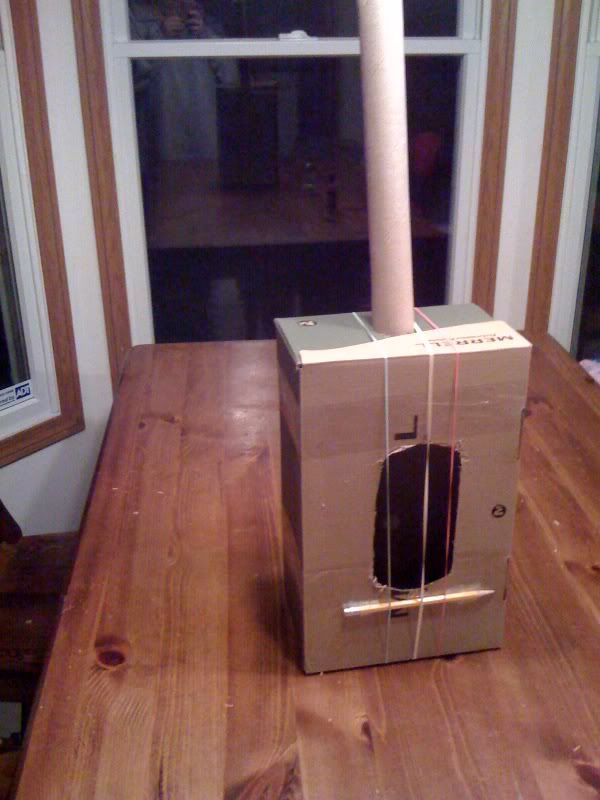
The Rhyme:
Hey Diddle Diddle,
The Cat and the fiddle.
The cow jumped over the moon.
The little dog laughed to see such a sight,
And the dish ran away with the spoon.
Age: 4 & up
Difficulty rating: 1 out of 5
Messiness rating: minimal
Supplies:
Tissue Box or Shoe Box
3-5 rubber bands
Paper towel roll
Pencil
Tape or glue (optional)
Decorations!
The Craft:
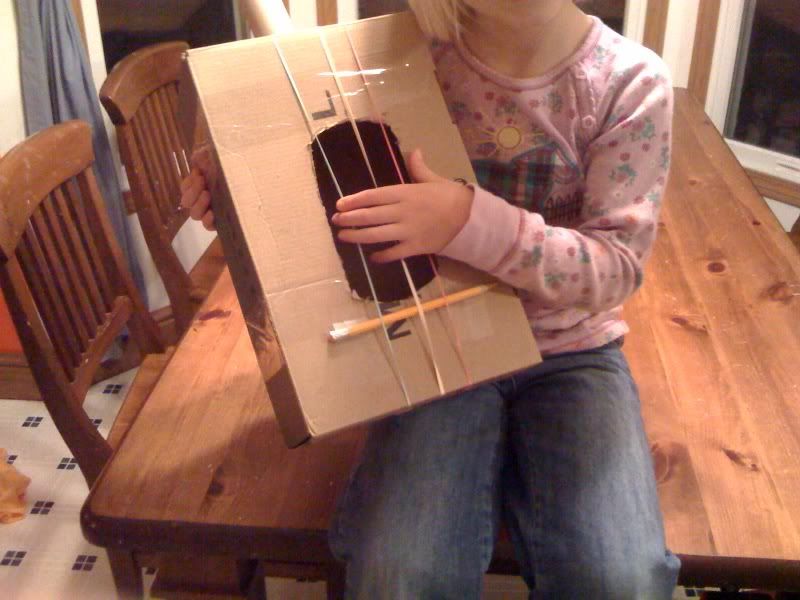
Here's mine!

The Rhyme:
Hey Diddle Diddle,
The Cat and the fiddle.
The cow jumped over the moon.
The little dog laughed to see such a sight,
And the dish ran away with the spoon.
Age: 4 & up
Difficulty rating: 1 out of 5
Messiness rating: minimal
Supplies:
Tissue Box or Shoe Box
3-5 rubber bands
Paper towel roll
Pencil
Tape or glue (optional)
Decorations!
The Craft:
- Tape the box closed.
- Cut a hole in the lid of the box. I made mine about 2" by 6". But the shoebox I used was large.
- Carefully place the rubber bands around the box so they are vertical across the opening.
- Trace the circle of the paper towel tube on the top of the box.
- Cut out the circle.
- Insert the paper towel roll into the hole.
- Place a pencil under the rubber bands at the bottom of the hole.
- Decorate. Bonus points for using cows, spoons, moons, cats, dogs and stars.
- Send in your pictures! I want to see them!
Here's mine!

Wednesday, January 6, 2010
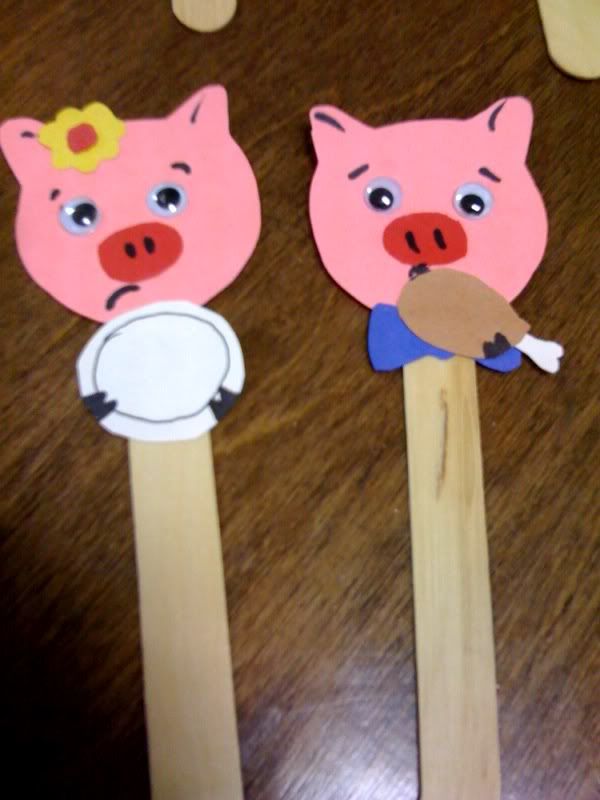
This Little Piggy
The Rhyme:
This little piggy went to market;
This little piggy stayed home;
This little piggy had roast beef;
This little piggy had none;
This little piggy went "whee, whee, whee" all the way home.
Age: 2 & up
Difficulty rating: 1 out of 5
Messiness rating: minimal
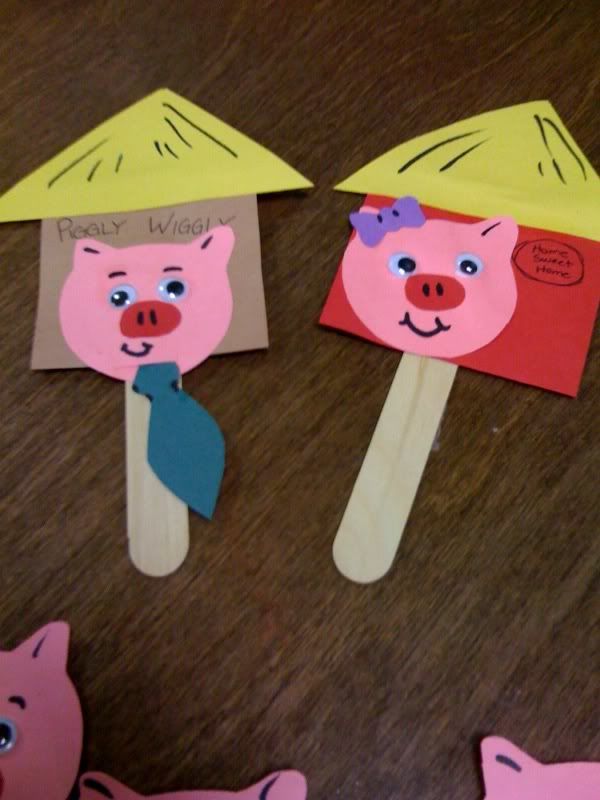
This craft rewards you with cute puppets for a puppet show! Plus it combines kiddie favorites--gluing and gluing. Big hit! The kids can also help cut out the figures.
5 jumbo craft sticks
Construction paper (pink, and any other color you feel like using. I used brown, purple, green, red, yellow, and so forth. Scraps are plenty--except for the pink.)
Googly Eyes (I love me some googly eyes, can you tell?)
Craft Glue
Black Marker
The Craft:
- Cut out the basic shape of a pig's head. (You can use the template here, if you want.)
- Cut out the noses.
- Cut out any additional shapes you might want to add. I used a bow-tie, a bow, a flower, a plate, roast beef (though it looks more like a turkey leg!), a necktie, a large square for the house & store and triangle roofs.)
- Glue on the googly eyes.
- Glue on the noses.
- Glue on the "extras."
- Glue it all to the craft sticks.

Subscribe to:
Comments (Atom)
